Inventor Basics - Ch 1 - Sketching
“It's back to school time!” Oh, how I dreaded that phrase as a child. It meant no more all-day/night Wiffle ball games or worse, the day I dreaded most, where I had to sit with my mom and go through the Sears & Roebuck Fall catalog to pick out my new school wardrobe. That was NOT what I wanted to be doing as a 10-year-old boy on a nice late summer day. But today, at least as far as this writing is concerned, the above phrase means we’re starting a new series of articles covering the basic skills and knowledge you need to know when working in Autodesk Inventor.
I preach the basics because without a working knowledge of the why and the how, all other advanced techniques are at risk. Always build on a solid foundation.
Sure, you can start using Inventor without going through the basics and fumbling your way along. Pick up a few tips & tricks along the way. But, if you want Inventor to operate the way you need or expect it to, that solid foundation is needed. The tools for that foundation are found within the basic commands and practices.
We will cover what you should know about the application to help get you to the next level and well beyond. With this series, we’ll build on the previous articles and progress through the typical processes of creating a part, assembly and associated drawings. Once the basics are completed, the more advanced subjects will follow. In due time, you’ll have mastered Inventor.
So, let’s get you started on making your workday a little less stressful, at least as far as CAD goes.
(For brevity, I will assume a few items along the way. In this case, we’ll assume your CAD Administrator has set up your needed template files and you can get going on modeling your first part in Inventor. Examples used in these articles will be directly from the “Out of the Box” installation. You are expected to transfer the knowledge learned to your specific custom needs.)
Ok, with all that out of the way, let’s get started.
One of the key factors in learning to use the Inventor application is to start off with a solid foundation. The more solid your foundation, the more stable your CAD files will be. This becomes very evident during the design process, but even more so during the editing process. How many times have you modified a parameter only to have the model update incorrectly, or throw a bunch of errors? With a solid foundation and proper practices used, editing will be a breeze. Unfortunately, few seem to follow this process and attempt to “force” in their changes.
When you first open a new part file, you’ll have a set of three predefined planes (1), three axis (2) and a center point (3) at 0,0,0.
These are system Origin items and cannot be modified, deleted, etc. These make up the base of your foundation. The general idea is to constrain your sketches and features to these origin features as much as possible. Granted, not every design is that simple and thus you, as a user, will find times where you’ll need to create the needed origins based on design intent. If you base such off these Origin features, your file will be stable and will perform the way you expect/need.
You are now ready to start your first sketch. This should be the base profile of the component, another foundation of sorts.
Keep your sketches simple. This is key when the time comes to edit.
Minimize the use of Chamfers and Fillets in your sketches as much as possible (we’ll explain why in a bit).
Let’s insert a Line.
Select the Start 2D Sketch icon from the Ribbon menu:
Once active, the mouse glyph will change, prompting you to select a plane to start the sketch on:
(Select the plane desired, note the highlighted preview)
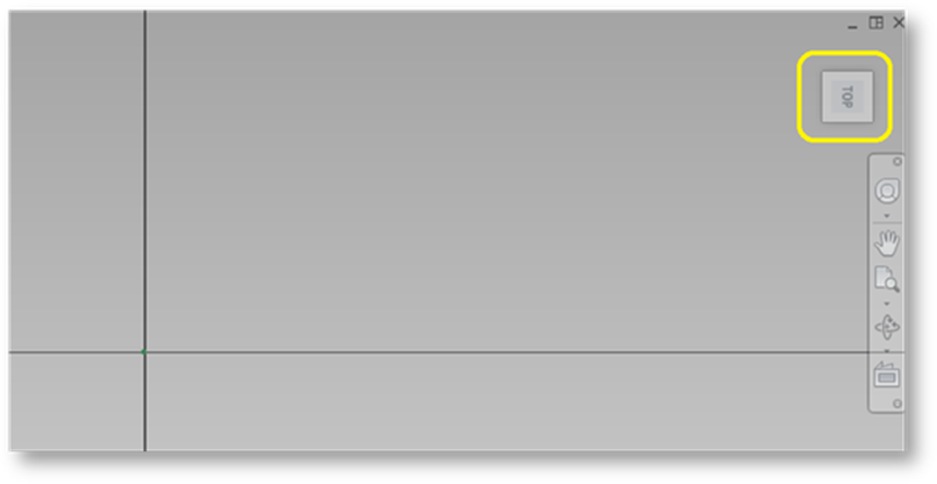
Once the desired plane is selected, the graphics area will adjust to be planar/normal to the screen and the X & Y Axis are shown along with the projected center point. Note the “View Cube” in the upper right of the graphics screen. Depending on how your templates are set, you may need to adjust the orientation of the sketch.
In the below case, the sketch is shown in Top View, but it’s rotated 90 degrees from what I prefer/want/need.
Placing the mouse over the View Cube will highlight its controls, select the appropriate rotation arrow:
A few key items to keep in mind before you start inserting sketch entities.
KISS – Keep It Stupid Simple.
In essence, don’t get too crazy with your sketches. Doing so may inhibit future editing abilities
At the same time, don’t be too simplistic either, otherwise you are simply creating more steps. Work smarter, not harder, right?
Consider labeling your Sketches/Features in the browser tree for complicated models. This makes it easier to identify what sketch controls what aspects of the feature it creates. Very helpful to your co-workers or even yourself if and when the file needs editing in the future.
Create your sketches with the assumption the design will change
Capture as much design intent as possible. This will work hand in hand with item #3
Always, ALWAYS constrain your sketches, especially the first sketch (or feature) to the system Origin.
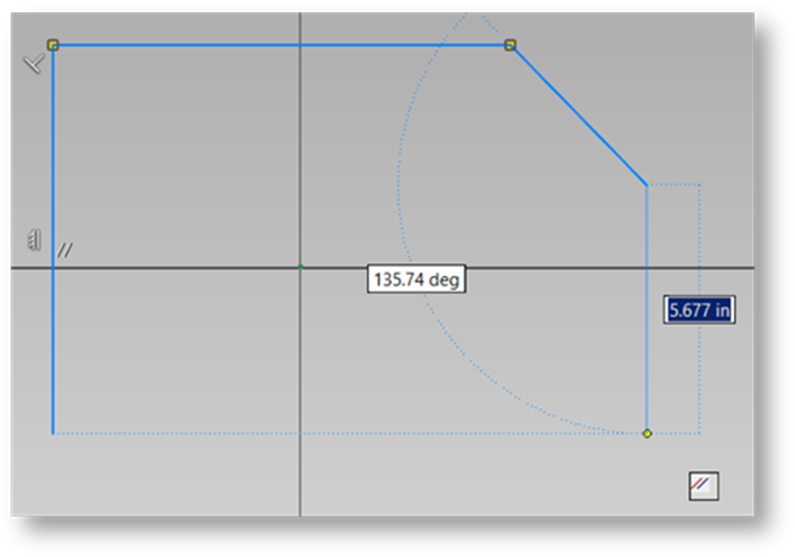
Select the Line icon on the ribbon menu, activating the insert line command. Left mouse click a location to start the line, repeat to locate the end of the line.
Note the glyphs and input boxes that are shown as you draw. You can modify these to your needs on-the-fly or after-the-fact.
Notes: for the line length parameter, shown above highlighted Blue is “active” and you can input the exact length needed for that entity. Use the Tab key to move from one parameter to another. This allows you to input ALL the parameters for that entity as you create it. On the flip side of that, you can also insert each entity, then go back and input each parameter as needed. Just be sure to always modify the largest parameter first, this sets the scale for the sketch graphics window.
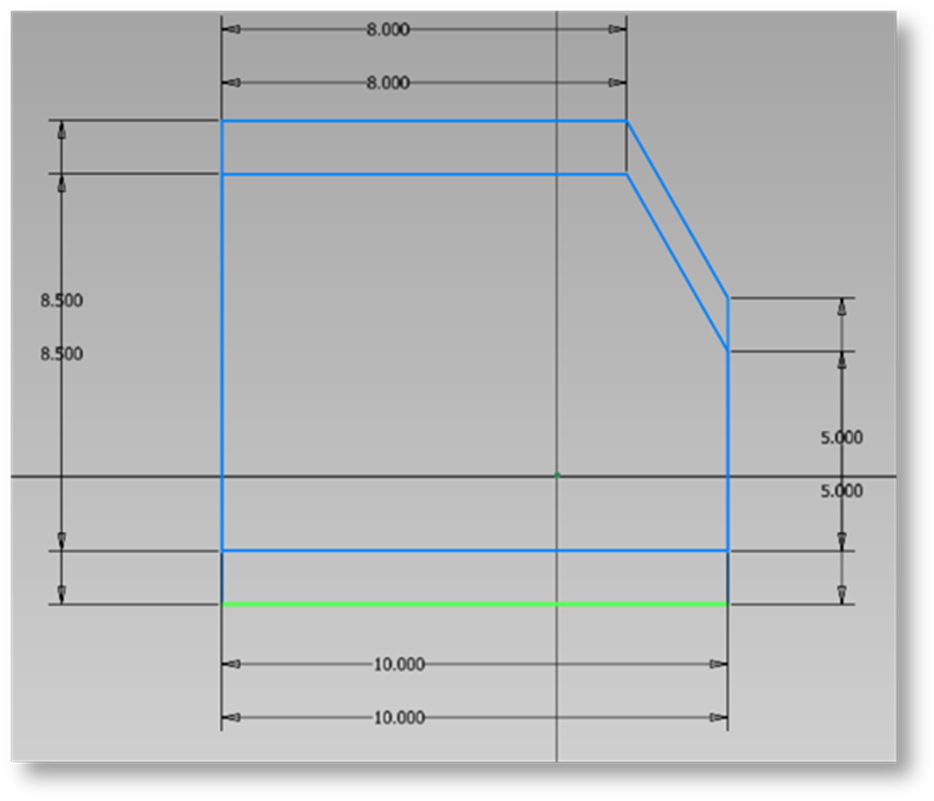
Adjust your sketch as needed for design by adding Dimensions (Parameters) and any other constraints needed by using the commands on the Constrain menu.
Notice the color of the sketch lines. With the color scheme I have active, unconstrained entities show light blue. This is a great visual aid to help identify unconstrained entities. Try different color schemes (in the Tools/Application Options menu/Color tab) and select the one that works best for you.
Although this sketch profile may be what you need, it isn’t fully constrained and, in this case, the entire sketch can move freely in 2D space: Note where the origin center/Axis are located in relation to the sketched profile.
You must “ground” the sketch to avoid inadvertent “shifting”. Yes, this can and does happen and to a point you may not notice, but enough to mess up the design later in the process.
If there’s just one item you pull from this write-up, may it be “constrain your sketches”. Make Constraints your friend. They will pay back the favor many times over.
In this case I will use the Coincident constraint to lock down/ground the left lower corner of the sketch to the system Origin Center Point:
Note the changed location as well as the entity color. You can also look in the lower right corner and Inventor tells you if your sketch is Fully Constrained or the number of dimensions/parameters still required to fully constrain the sketch.
At this point our sketch is complete and our next step is to create a 3D feature with it. Select Finish icon at the far right of the sketch menu, or click the right mouse button (RMB) and select “Finish Sketch” from the heads-up display menu. Your sketch is closed, and the graphics window rotates to an isometric angled view. At this point you can use one of the Boolean operations found on the 3D Model ribbon menu based on what outcome you need to give your sketched profile depth. For graphical purposes, I’ve used the basic Extrude command.
During this process you may have noticed a small “down arrow” on the command icon:
Selecting this arrow expands the menu, offering several other “line” commands. You’ll see this on numerous command icons.
This same basic practice can be applied to the other sketch commands
Insert Circle
Insert Arc
Insert Fillet
Insert Rectangle
Project Geometry:
The Project Geometry command does just that, it projects existing geometry (edges, points, planes, axis, etc.) onto the currently active sketch. This allows you to base your constraints off the existing geometry.
Here is a basic example where “Design Intent” comes into play. You’ve just constrained your new sketch to a projected edge of an existing feature. If the length (20.000) of that feature changes, the sketch/feature constrained to said edge will also adjust accordingly.
For example, I have a 20” long plate with a cutout center that must be 2.00” from the edge as shown:
But later in the design process, it’s determined the length of the plate needs to change from 20” to 18”:
You want to be sure the design requirements are held as needed during editing. If you had constrained that cutout from the opposite edge of the plate, it would not maintain the 2.00” distance the design requires.
The Modify panel:
These commands do just what they are called, for brevity, we won’t go into each of these here. We will cover most of these during this series as they apply.
Pattern Panel:
Patterns can be very simple to very complex. Here we will just touch on what the command offers.
A key note to consider, if at all possible, refrain from using Sketch items such as Fillets, Chamfers and Patterns, as they may be much easier to maintain as a model feature instead. Here’s why:
When putting these items within a sketch, they get consumed by the 3D feature the sketch creates. If and when you need to modify one of those, you’ll need to know, not only what feature’s sketch they reside in, but also which sketch (if multiple are used for that feature). By creating these as model features, they get their very own feature designation in the model tree. Here you can even modify the feature label to signify what the feature is or what it’s related to, etc. making it far easier to locate within the model for edits.
Rectangular:
Allows you to create.…you guessed it, a rectangular pattern of the selected sketch entities. Keep in mind, this doesn’t mean all patterns are or have to be vertical and horizontal, you can specify the directions and orientation of the pattern. Again, we will get into these in a later article as there are some options that require detail.
Circular:
Allows you to create a circular pattern of the selected sketch entities around a Point, Vertex or Axis.
Mirror:
Allows you to mirror the selected sketch entities across an axis. Any sketch line may be used as the axis.
The Constraint Menu:
As we touched on earlier in this article. This is where you’ll find your sketch dimension and geometric constraint commands.
The Insert menu:
This allows you to import an Image, Points (in X Y coordinates) from Excel or entities from an AutoCAD file into your active sketch.
The Format menu:
This menu offers you the commands of (from left to right and top to bottom):
Construction – Changes the selected geometry to Construction geometry
Driven Dimension – Changes a sketch dimension controlling the geometry to a dimension that is controlled by the geometry
Centerline – Changes sketch line to a centerline
Center Point – Changes a sketch point to a Center Point
Note: the 4 above command options can also be selected prior to creating the needed geometry. All geometry created after activation will be created in that active format until de-selected.
Toggle Format – Toggles between user-applied property settings and the system default settings for line type, color, and line weight for all sketch entities. The pull-down arrow offers the ability to select changing of individual sketch entities
And finally, at the far end of the Sketch ribbon menu you’ll find the “Finish Sketch” command.
Allows you to finish the current sketch or Cancel/Exit the sketch without applying any changes.
And with that, you are now familiar with the Sketch environment and how to create a basic sketch in Inventor. We will be using many of these commands in the following articles and examples throughout this series. As we progress, we will create individual parts, use such to create an assembly and then finally the steps on how to create detail drawings of each.
For more detailed steps and information, please feel free to comment and or reach out to me directly.
In the next blog in this series, we’ll create our first solid feature and continue to build secondary sketch/features to complete the component for production.
Until then, be safe and Happy CADing!


